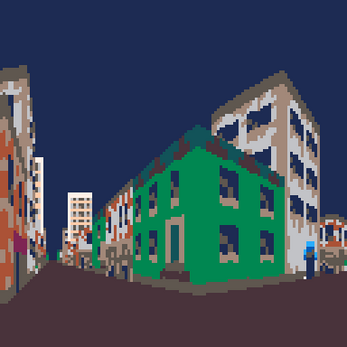
3D Graphics Tutorial Series
This is an ongoing project where I am developing an increasingly advanced 3D rendering method for Pico-8 and making tutorial videos on my YouTube channel so you can use it too. You can see the end result in the browser-playable project above, which I'll update as the engine improves.
Each downloadable project includes .js and .html files so you can run the demo, and a .p8 file which you can open with pico-8 to see how it was made. Each one corresponds to a YouTube video you can find on my channel, Dev Quest. Here's the link: https://www.youtube.com/channel/UCL5t4tBDT9PfmqtA5ziG0xQ
Let me know if you end up using this in a game, I'd love to see it.
| Status | In development |
| Platforms | HTML5 |
| Rating | Rated 5.0 out of 5 stars (1 total ratings) |
| Author | Isaac Games |
| Made with | PICO-8 |
| Tags | 3D, 8-Bit, First-Person, Game Design, PICO-8, Tutorial |
Download
Download NowName your own price
Click download now to get access to the following files:
Draw Walls Demo Download 432 kB
Texture Walls Demo Download.zip 452 kB
Tall Walls Demo Download.p8 11 kB
3d City Browser Demo Download 32 kB

Comments
Log in with itch.io to leave a comment.
bro put a shootout on the demo, minchia you have the game of the year
Will this include the features in your demo such as variable height walls and collision detection? It's disingenuous that your demo has features that aren't included in the download.
Just sent you an email. Hoping you can resolve this.
Thank you for bringing this to my attention, I see the misunderstanding. Each demo corresponds one of the tutorial videos, and I have only made the first two so far. The third was going to include those features you mentioned, and the playable demo on this page was just a preview. However, I haven't continued this project, so the third installment was never uploaded. I'll find the file and upload it shortly. Although, fair warning, it was designed as a demo rather than a teaching tool, so it may not be commented as thoroughly as the others. If and when I continue this series, I'll replace it with a more organized, teaching-focused product. Thank you for your patience and I hope it will be helpful to you.
All good Isaac, thanks for making this available, appreciate it!
You're welcome!
Does anyone know how to make the map size bigger?
I am very new and know very little lua
Inside the while loop that does the actual raycast, there's an if statement that checks if the ray has gone out of bounds and stops it. It'll look like:
if mget(x,y)>0 or x<0 or x>31 or y<0 or y>31 then
-- stop the ray
You can change those numbers to change the size of the visible map. This demo uses pico-8's map, so it's limited to 128x64. If you need something larger than that, you could use a table instead, which can be whatever size you want.
Just be aware, when the map gets too big it may start to lag because the rays are checking every intersection across the whole map. You can solve this with fancy optimization, or just avoid making wide open spaces or very long tunnels.
Hope this helps!
Hey Isaac you could use the COS() of the and difference of the ray from the player to smooth the fisheye.
Yep, that would work. I think there's even a piece of code in the demo you can un-comment to remove the fisheye effect that does exactly that, but I like the fisheye effect so I kept it that way.
So smooooooooooth
I am curious about how Pico-8 translates to JS, what tech it uses, 2d canvas, or is it webgl? It's drawing fast and pixels (5*5?) are razor sharp (=no canvas scaleing) So I downloaded and may investigate :). Raycasters are fascinating, but this one lacks of player rotation and collision handling. The latter is easy in a raycaster that uses a 2-dimensional grid for cubes. See the ascii raycaster on my page.
I haven't looked into the JS that pico-8 generates, I have no idea how it works. I haven't added collision because I want to focus on the graphics first. You mentioned lacking player rotation, I have left and right rotation controlled by z and x in the browser example. It's a little janky, but like I said, I'm just focusing on the graphics.
I've never done an ascii renderer before, that looked really cool. I played your more recent one too, and that was amazing. I might have to try it out for myself sometime.
Thanks. It's actually simple, once you have reduced the resolution of any 3D engine to something like 80*40. The artistic part is then to choose 16 letters for a grey scale.
It's originally a C/C++ application, ported to web with Emscripten.
but if you want pixel-scaling on a 2d canvas, one trick is to use this CSS
image-rendering: pixelated;
https://developer.mozilla.org/en-US/docs/Games/Techniques/Crisp_pixel_art_look
Thanks.